
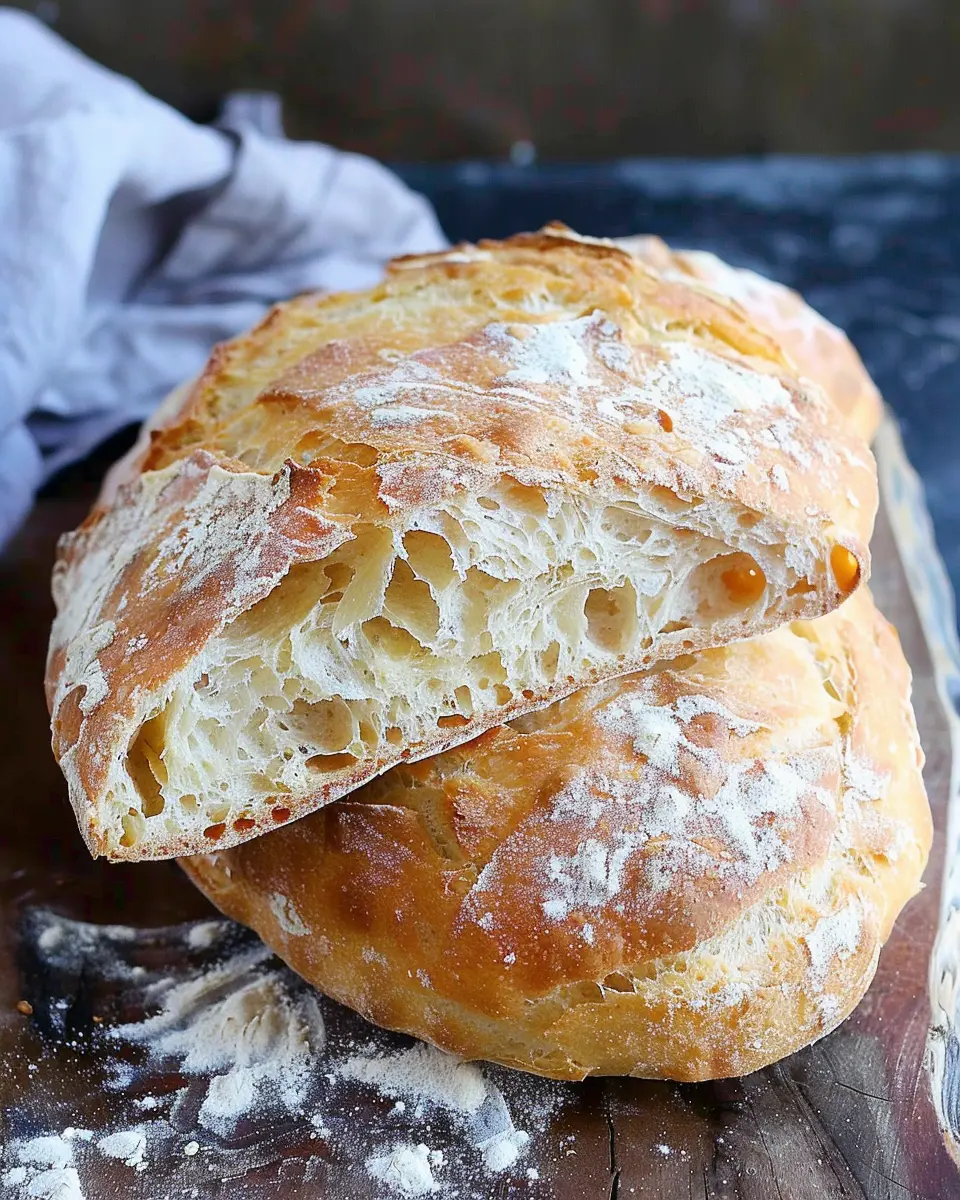
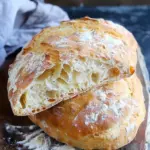
Introduction to Rustic Italian Crusty Bread
There’s something incredibly rewarding about creating your own homemade bread. It’s not just about the aroma that fills your kitchen; it’s about the satisfaction of crafting something delicious from just a few simple ingredients. When you bake a loaf of rustic Italian crusty bread, you embark on a culinary adventure that not only feeds your body but also nourishes your soul.
Why Homemade Bread is Worth the Effort
Ever bitten into a loaf of bread with a crispy crust and a soft, airy interior? That’s the magic of a well-made bread, and trust me, there’s an unmatched joy in achieving it yourself. While store-bought options are convenient, they often lack the freshness and personality that homemade produces. According to a piece by the Bread Bakers Guild of America, the bread you make at home can have more complex flavors, thanks to longer fermentation times which enrich the dough.
But, is it really worth your time? Absolutely! Here’s what makes a rustic Italian crusty bread recipe exhilarating:
- Simplicity at Its Best: With just flour, water, salt, and yeast, you create a delightful loaf with minimal ingredients.
- Customizable: The adventure doesn’t stop at the basic recipe. You can add herbs, olives, or even sundried tomatoes to personalize your loaf.
- Healthier Choice: Homemade bread often contains fewer preservatives and additives compared to mass-produced alternatives, making it a healthier option for you and your family.
Think about it: instead of relying on plastic-wrapped bread that’s sat on a shelf for who-knows-how-long, you could enjoy a warm, crusty loaf that you made from scratch. It can be the perfect pairing for your favorite soups or a delectable side for any meal.
For a fun twist, consider making this a weekend project to share with friends or family. Offer slices of your fresh bread with some olive oil for dipping, or serve it alongside a vibrant salad. Whichever way you choose to enjoy it, the joy of breaking bread together is hard to replicate. So roll up your sleeves and let’s dive into this rustic Italian crusty bread recipe that will surely impress your taste buds!
Feel free to check out more insights on homemade bread baking at sources like King Arthur Baking Company or BBC Good Food for even more tips and tricks!
Ingredients for Rustic Italian Crusty Bread
Essential ingredients you need
To prepare a delightful rustic Italian crusty bread, you’ll want to gather the following essential ingredients:
- Flour: Use high-protein bread flour for that perfect chewy texture.
- Water: Essential for hydration, ideally around room temperature or slightly warm.
- Yeast: Active dry yeast works wonders, helping the dough rise beautifully.
- Salt: This enhances flavor and strengthens the gluten structure.
- Olive Oil: Adds a lovely richness and depth to your rustic Italian crusty bread recipe.
These simple, quality ingredients will yield a loaf that is both fragrant and inviting!
Special tools that can make your life easier
A few kitchen tools can elevate your bread-making experience:
- Mixing Bowl: A large bowl for kneading and resting the dough.
- Dough Scraper: Handy for managing sticky dough.
- Baking Stone or Steel: Provides an even heat that creates a perfectly crispy crust.
- Lame or Sharp Knife: For scoring the dough, allowing it to expand properly in the oven.
Investing in these tools not only simplifies the process but can also enhance the quality of your bread. Want to dive deeper into the art of bread-making? Check out this bread-making guide for tips and techniques!
Preparing Rustic Italian Crusty Bread
There’s something truly rewarding about baking your own rustic Italian crusty bread at home. The aroma wafting through your kitchen, the satisfying crunch of the crust, and the soft, airy interior make this more than just a recipe—it’s an experience. Let’s dive into the steps to create your very own beautiful loaf of bread!
Gather your ingredients
Before we dive into the rustic Italian crusty bread recipe, it’s essential to gather all your ingredients. You’ll need:
- 4 cups bread flour (or all-purpose flour)
- 2 teaspoons salt
- 2 teaspoons sugar
- 1 packet (2 1/4 teaspoons) active dry yeast
- 1 ½ cups warm water (about 110°F)
- Optional: a dash of olive oil for flavor
Using high-quality flour can make a significant difference, so consider checking out King Arthur Baking for flour options. Your choice of olive oil can also elevate the taste, adding depth to your bread.
Mix the dry ingredients
In a large mixing bowl, combine your bread flour, salt, sugar, and yeast. Whisk these ingredients together until they are well combined. It’s a simple yet critical step because the salt and yeast should never be directly combined until the liquid is added. Salt can inhibit yeast growth if they meet too soon!
Combine with warm water
Now that your dry ingredients are ready, it’s time to add the warm water. Slowly pour the water into the dry mixture, stirring gently with a wooden spoon. The goal here is to mix until no dry flour remains, forming a rough, shaggy dough. It’s okay if the dough seems a bit sticky; this will contribute to the rustic texture we’re after.
Here’s a tip: if you’re unsure about the water temperature, test it on your wrist—should feel warm but not hot!
Let the dough rise
Cover the bowl with a clean kitchen towel or plastic wrap and let it rise in a warm place for about 1-2 hours. You want the dough to double in size. This fermentation process is crucial, as it develops the flavors that make your bread truly rustic.
If you’re facing a chill in your kitchen, consider placing the bowl near a warm stove or in an oven set to low (then turned off) to accelerate the rising process.
Shape the dough
Once your dough has risen, it’s time to shape it. Lightly flour your working surface and gently turn the dough out. Using floured hands, fold the dough over on itself a few times to create surface tension. Without deflating it too much, shape it into a round or oval loaf.
Place it on a floured baking sheet or in a well-floured proofing basket and cover it again. Allow it to relax and rise for another 30-60 minutes. This step contributes to a superior texture and crust when baked.
Preheat the oven
Here comes the exciting part! About 30 minutes before you’re ready to bake, preheat your oven to 450°F (about 232°C). For those seeking extra-crispy crusts, place a cast-iron skillet or an oven-safe dish filled with water on the bottom rack. This will create steam that helps the crust develop beautifully.
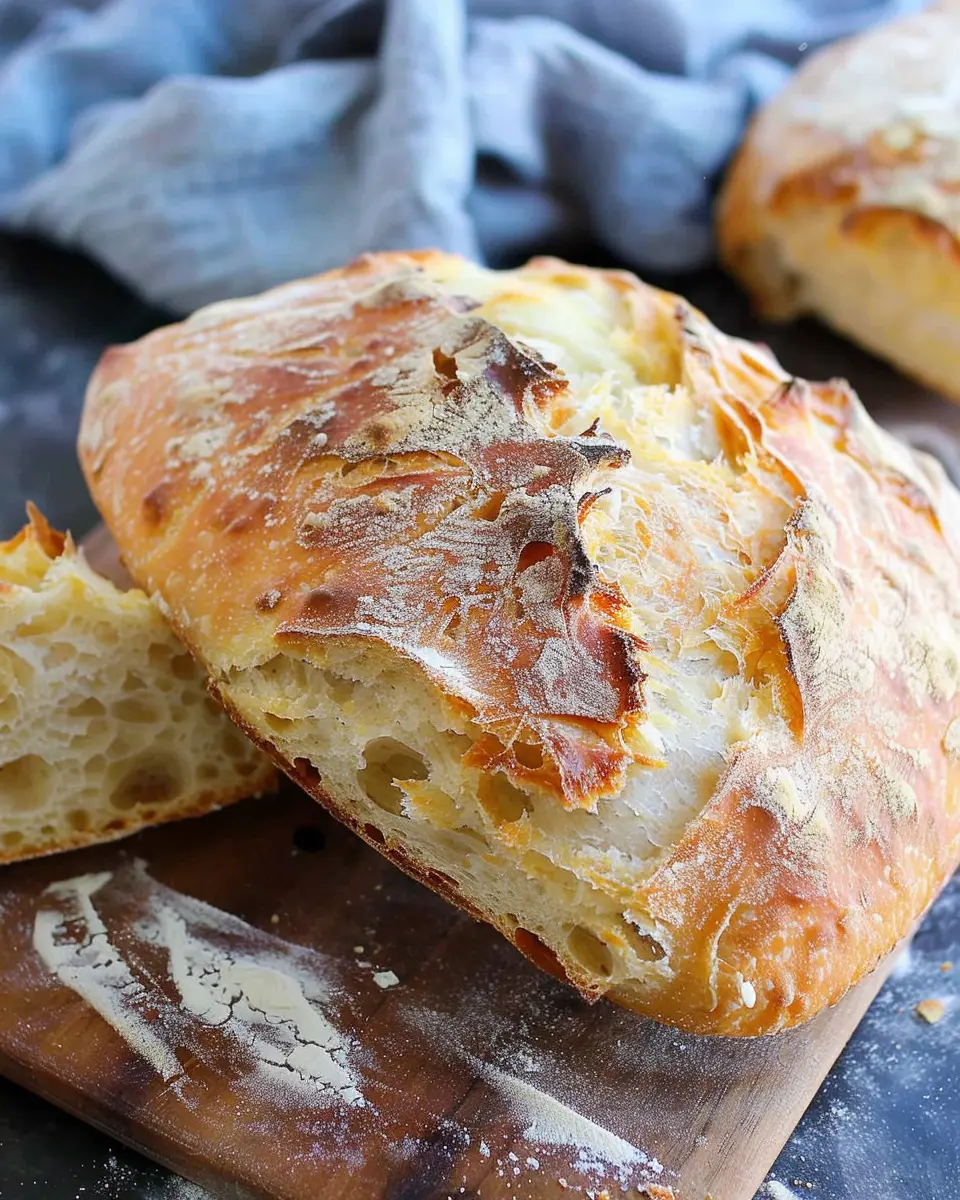
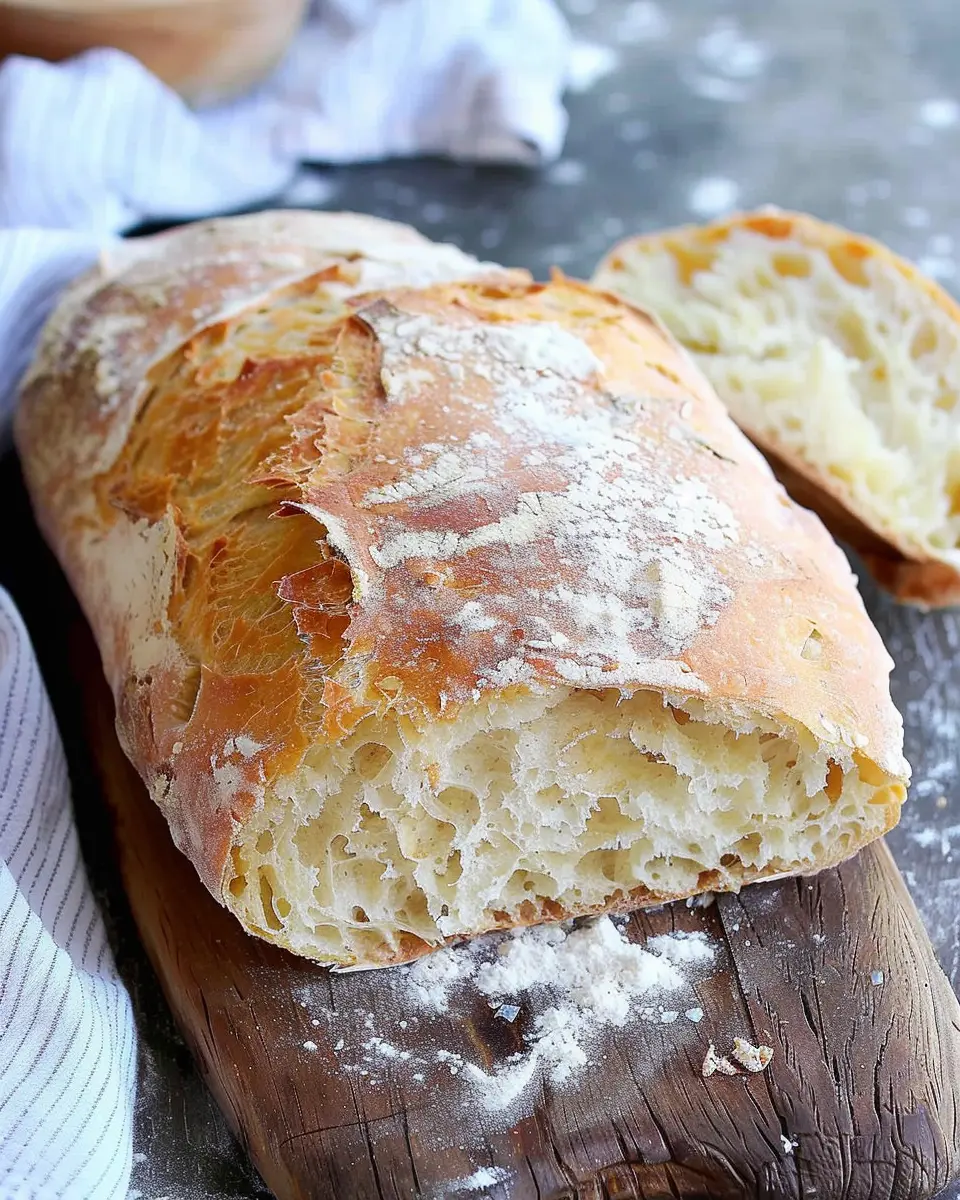
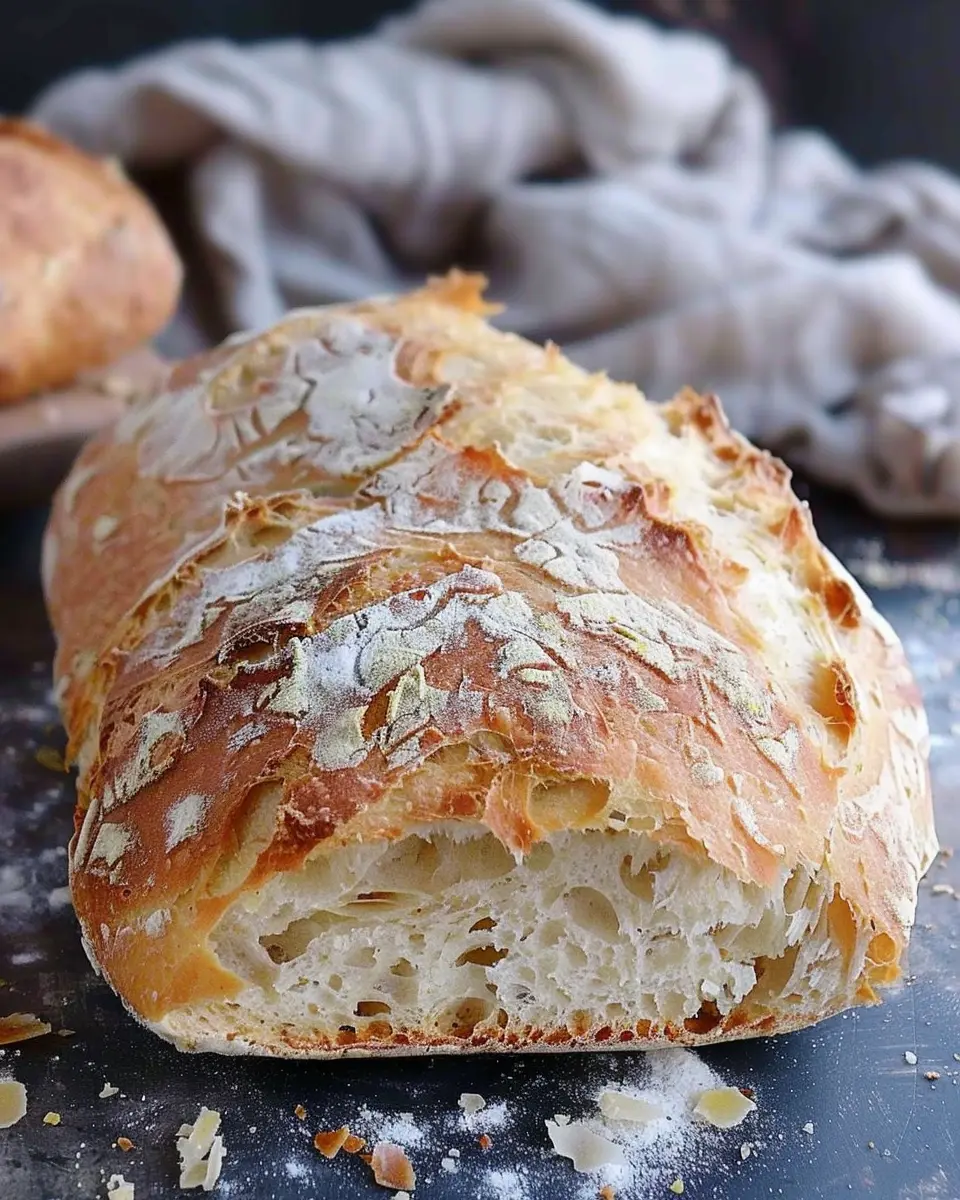
Bake to perfection
When your oven is ready and the dough has proofed, it’s time to bake! Carefully transfer your loaf into the preheated oven. Bake for about 30-35 minutes, or until the bread has a deep golden-brown crust and sounds hollow when tapped on the bottom.
Let it cool on a wire rack, and just try to resist slicing it before it cools down completely. The texture and flavors will be worth the wait! Consider pairing your freshly baked bread with olive oil and balsamic vinegar for dipping, or use it for a delicious sandwich featuring turkey bacon or chicken ham.
There you have it! Following these steps will ensure you’re not just another home baker but a purveyor of amazing rustic Italian crusty bread. For more tips on bread-making, check out resources like Bread Enthusiast for further exploration into this delightful craft. Enjoy your baking journey!
Variations on Rustic Italian Crusty Bread
Adding herbs and spices for flavor
One of the best ways to personalize your rustic Italian crusty bread recipe is by incorporating your favorite herbs and spices. Imagine breaking open a loaf infused with fragrant rosemary or zesty oregano! These additions not only enhance the bread’s aroma but also elevate its flavor profile.
- Rosemary: A classic for Italian breads, it adds a woodsy note that pairs beautifully with olive oil.
- Garlic powder: If you love garlic, gently fold some into the dough for a delicious twist.
- Crushed red pepper flakes: For a touch of heat, sprinkle in some flakes for an exciting kick.
Experimenting with these ingredients allows you to create a bread that perfectly matches your meal or gathering.
Incorporating cheese or olives
What’s better than a good loaf of bread? One that’s packed with savory surprises! Adding cheese or olives to your rustic Italian crusty bread recipe not only brings a delightful richness but also adds texture.
- Cheese: Sharp cheddar, tangy feta, or even creamy mozzarella can create a delightful mélange of flavors. Imagine biting into a slice and finding melted cheese oozing out!
- Olives: Chopped Kalamata or green olives can offer a briny contrast that complements the bread’s crustiness.
Don’t hesitate to get creative with these variations; the world of artisan bread is all about exploration! As you experiment, remember—you might just create a crowd favorite. If you’re looking for more incredible ideas, check out links from sources like Breadtopia or King Arthur Baking where you can find fresh inspiration. Happy baking!
Baking Notes for Rustic Italian Crusty Bread
Common Pitfalls to Avoid
When following your rustic Italian crusty bread recipe, keep an eye out for common mistakes that could hinder your baking experience:
- Under-kneading the dough: Ensuring adequate gluten development is crucial for that lovely crumb structure. Aim for a smooth, elastic texture.
- Skipping the rest period: Patience is key! Give your dough time to rise; this builds flavor and improves texture.
- Overcrowding the oven: Baking multiple loaves at once can reduce steam circulation, affecting crust quality.
Tips for Achieving the Perfect Crust
To achieve that beautifully crunchy crust, consider these expert techniques:
- Use steam: Place a pan of hot water at the bottom of your oven while baking. This creates steam, helping the crust to develop its signature character.
- Preheat thoroughly: Get your oven nice and hot, around 450°F (232°C). A well-preheated oven ensures a great oven spring.
- Experiment with flour: Consider using a mix of bread flour and all-purpose flour to enhance texture and flavor.
Embrace these tips for a fabulous batch of rustic Italian crusty bread that impresses your friends and elevates your meals! For additional resources, check out King Arthur Baking and The Bread Book for further reading on bread-making techniques.
Serving Suggestions for Rustic Italian Crusty Bread
Pairing with Dips and Spreads
One of the easiest and most delightful ways to enjoy your rustic Italian crusty bread recipe is with a variety of dips and spreads. Think classic things like:
- Olive oil and balsamic vinegar: A simple mix for a traditional Italian starter.
- Hummus or Baba Ganoush: Elevate your appetizer game with these rich, flavorful spreads.
- Artisan cheese spreads: Pair it with a creamy goat cheese or tangy feta for a stellar combination.
These options not only complement the bread, but they also introduce a burst of flavor that can turn a simple meal into a memorable culinary experience.
Creative Ways to Enjoy Your Bread
But don’t stop there! Get creative with your rustic bread:
- Bread bowls: Hollow out a loaf and fill it with hearty soups or stews. It’s a fun, interactive meal!
- Sandwiches: Use crusty slices for upscale sandwiches with ingredients like turkey bacon or chicken ham, layered with fresh veggies.
- Bruschetta: Top grilled slices with tomato, basil, and garlic for a vibrant starter.
Whether enjoyed thinly sliced with cream cheese or piled high with delicious toppings, your rustic Italian crusty bread is sure to be a crowd-pleaser! Try it out this weekend for a delightful twist on your culinary repertoire.
Time Details for Rustic Italian Crusty Bread
Preparation Time
Getting started with your rustic Italian crusty bread recipe only takes about 20 minutes. This step involves gathering your flour, yeast, salt, and water, and mixing them together. Don’t worry if things seem a bit messy at first—it’s a key part of the process that adds to the charm of homemade bread.
Rising Time
Patience is key here, as the dough needs to rise for a solid 12 hours at room temperature. You can even do this overnight! This long rise allows the flavors to develop beautifully, resulting in that delectable, artisanal taste.
Baking Time
The actual baking takes about 30-35 minutes. Preheat your oven to create that perfect crispy crust. You’ll want to keep an eye on it to ensure it’s golden brown and calling your name by the end of the baking time.
Total Time
When you add it all up, you’re looking at roughly 12 hours and 55 minutes in total. Though it may seem lengthy, most of that time is hands-off—perfect for a busy schedule! If you’re curious about the science behind bread making, check out this article from Serious Eats. Enjoy the process!
Nutritional information for Rustic Italian Crusty Bread
When you make a loaf of rustic Italian crusty bread, you’re not just baking—you’re creating an experience that everyone will enjoy. But it’s always good to know what you’re putting into your body! Here’s a quick breakdown of the nutritional information for a single slice (about 1 ounce) of this delicious bread:
Calories
A slice contains approximately 80-90 calories. That’s pretty reasonable considering the taste it brings to your meals!
Protein
You can expect around 2-3 grams of protein in each slice. While this isn’t a massive boost, every bit counts when you’re rounding out a meal or snack.
Sodium
This bread typically has around 140-160 mg of sodium per slice. Lowering your sodium intake can be beneficial, so enjoy this bread in moderation.
For more about healthy eating, check out Nutrition.gov, which offers delicious alternatives and tips to enhance your daily meals! Remember, while rustic Italian crusty bread is a delightful choice, pairing it with nutritious toppings like fresh vegetables or lean proteins can really elevate your dining experience.
FAQs about Rustic Italian Crusty Bread
Can I use gluten-free flour?
Absolutely! If you’re looking to adapt the rustic Italian crusty bread recipe, you can use gluten-free flour blends. However, keep in mind that the texture and rise may vary. Look for blends that contain xanthan gum or chia seeds to help mimic the elasticity of traditional flour. Many bakers find success with a combination of brown rice flour, almond flour, and tapioca flour. For tips on substituting, websites like Serious Eats offer great insights into gluten-free baking.
How do I store my homemade bread?
Storing your rustic Italian crusty bread properly is crucial for maintaining its freshness. Here’s how:
- Room Temperature: Keep it in a paper bag for a day to allow it to breathe, avoiding plastic, which traps moisture and can make the crust soggy.
- Freezing: If you want to store it longer, wrap it in foil first and then place it in a freezer bag. Homemade bread can last up to 3 months in the freezer.
When you’re ready to enjoy it again, simply thaw at room temperature or pop it in the oven for a few minutes to rejuvenate that crunchy crust.
What can I do with leftover bread?
Don’t let that delicious bread go to waste! Leftover rustic Italian crusty bread can be transformed into delightful dishes:
- Breadcrumbs: Pulse in a food processor for fresh breadcrumbs—great for toppings or binding agents in recipes.
- Croutons: Cut into cubes, season, and bake for homemade croutons; perfect for salads or soups.
- Panzanella Salad: Create a refreshing Tuscan bread salad by tossing chunks of stale bread with tomatoes, cucumbers, and a punchy vinaigrette.
These tips will not only help you avoid waste but also elevate your culinary game! For more creative uses of leftover bread, check out Food Network.
Conclusion on Rustic Italian Crusty Bread
The satisfaction of making your own bread
There’s nothing quite like the sense of accomplishment that comes from baking your own bread. With each crusty loaf made following this rustic Italian crusty bread recipe, you’ll find joy in the process and the delightful aroma wafting through your kitchen. Kneading the dough, watching it rise, and finally hearing that satisfying crunch as you slice into the crust—these moments can transform an ordinary day into something special.
Making homemade bread not only elevates your culinary skills but also offers healthier options to store-bought alternatives. Plus, you can customize your bread with herbs or toppings to match your meal perfectly. Whether enjoyed with a bowl of soup or as the base for a tasty sandwich with Turkey Bacon or Chicken Ham, this bread is a versatile delight. Explore more about the art of bread-making at sites like King Arthur Baking or The Bread Lab for insights and tips to perfect your craft.
PrintRustic Italian Crusty Bread Recipe: The Best Homemade Delight
Learn how to make the best rustic Italian crusty bread with this easy recipe.
- Prep Time: 15 minutes
- Cook Time: 30 minutes
- Total Time: 12 hours 45 minutes
- Yield: 1 loaf
- Category: Bread
- Method: Baking
- Cuisine: Italian
- Diet: Vegetarian
Ingredients
- 4 cups all-purpose flour
- 1 1/2 cups warm water
- 1 teaspoon instant yeast
- 2 teaspoons salt
Instructions
- In a large bowl, mix flour, yeast, and salt.
- Gradually add warm water and mix until a shaggy dough forms.
- Cover and let rise at room temperature for 12-18 hours.
- After rising, turn the dough out onto a floured surface and shape into a ball.
- Preheat the oven to 450°F (232°C) and bake in a Dutch oven for 30 minutes.
Notes
- For a crispier crust, you can add steam to the oven during the first few minutes of baking.
- This bread is best enjoyed fresh but can be toasted for later use.
Nutrition
- Serving Size: 1 slice
- Calories: 120
- Sugar: 0g
- Sodium: 150mg
- Fat: 1g
- Saturated Fat: 0g
- Unsaturated Fat: 0g
- Trans Fat: 0g
- Carbohydrates: 24g
- Fiber: 1g
- Protein: 4g
- Cholesterol: 0mg


")